Administrator's Guide
- Former user (Deleted)
- Martin Hühn
- Nicole Hühn
Installation
Installation via the integrated marketplace
Accessing Universal Plugin Manager at...
Click on  at the top right of the page and select Add-ons. The Atlassian Marketplace screen is loaded.
Click on at the top right of the page. The administration screen is loaded.
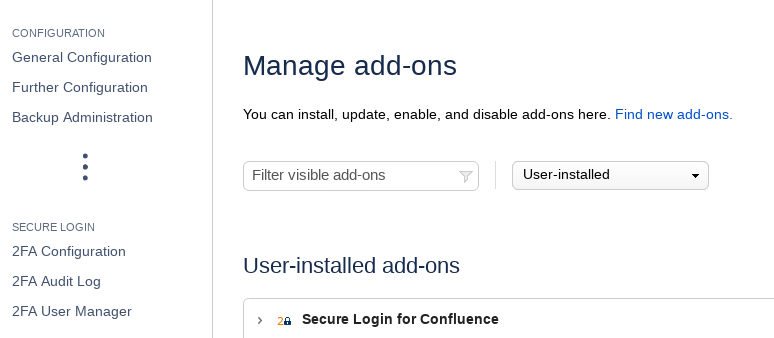
Click on at the top right of the page and select Add-Ons. The "Manage add-ons" screen is loaded.
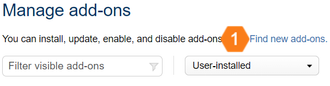
 Now click on the Hyperlink saying "Find new add-ons" just under the Headline.

 Enter Secure Login in the search field and click on the magnifying glass. Secure Login now appears in the search results.
 Click Free trial to get a trial license or Buy now to purchase a license for Secure Login. You will be asked to log in to MyAtlassian while the Secure Login download begins. Enter your credentials and click Generate License when you are redirected to MyAtlassian. Finally, click Apply license.
Manual installation
You can also download Secure Login directly from the Atlassian Marketplace and upload it as a jar file using the Universal Plugin Manager. The documentation of the Universal Plugin Manager describes how it works. You will also find much more information about installing plugins there. If you have more questions about licensing plugins, visit the Atlassian licensing documentation. Here you will also find much more general information about plugins for Atlassian products.
If you have any problems installing Secure Login, please do not hesitate to contact us via our Service Desk. We will find a solution to your problem.
Navigation
Accessing Secure Login navigation at...
Secure Login navigation is located in the admin area for add-ons. Click on at the top right of the page and select Add-ons. The Atlassian Marketplace screen is loaded. On the left side, you will find the Secure Login navigation. Use this navigation to access the configuration, audit log and user manager of Secure Login.
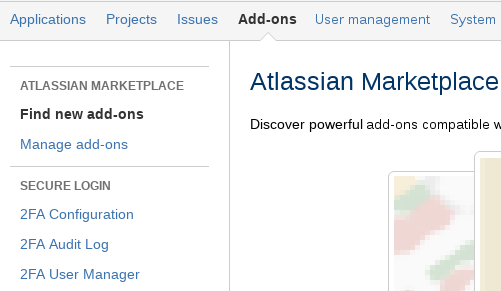
Secure Login navigation is located in the admin options. Click on at the top right of the page and select Add-Ons. The Manage add-ons screen is loaded. On the left side, you will find the Secure Login navigation. Use this navigation to access the configuration, audit log and user manager of Secure Login
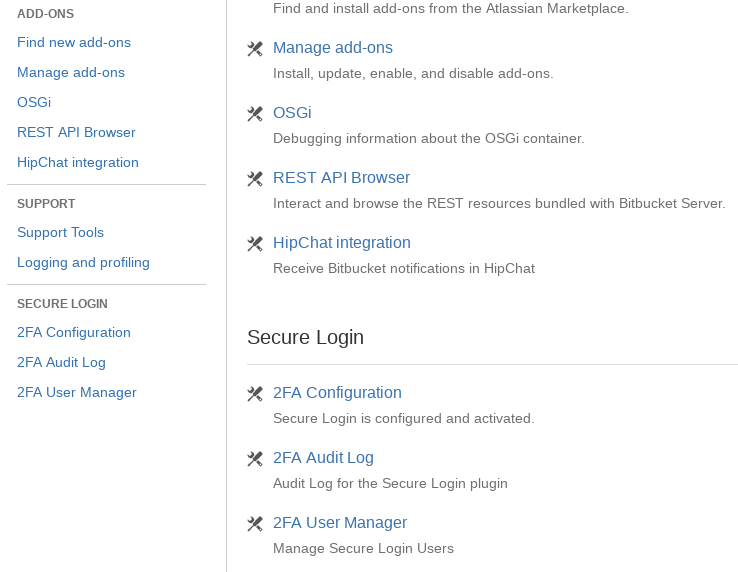
Secure Login navigation is located in the admin area. Click on at the top right of the page. The administration screen is loaded. Here you will find the Secure Login navigation. Use this navigation to access the configuration, audit log and user manager of Secure Login.
Secure Login navigation is located in the admin options. Click on at the top right of the page and select Add-Ons. The Manage add-ons screen is loaded. On the left side, you will find the Secure Login navigation. Use this navigation to access the configuration, audit log and user manager of Secure Login

Configuration
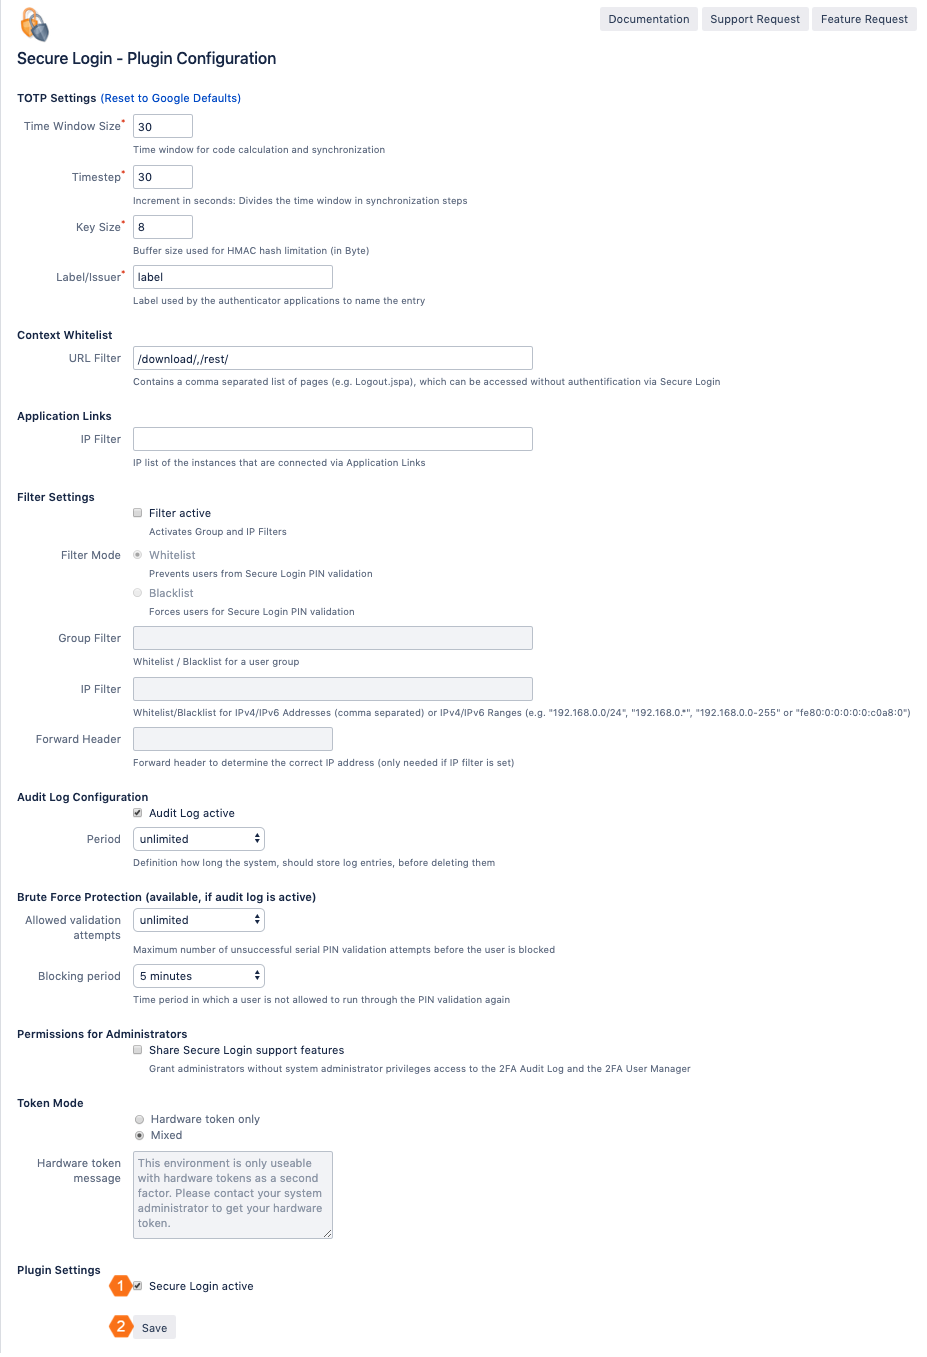
Before you can use Secure Login, the plugin must be installed and enabled in the Universal Plugin Manager. Also, Secure Login functionality must be enabled in its configuration. Secure Login will perform the pin validation as soon as it has been activated in its configuration. In addition to the activation, you have a variety of ways to customize Secure Login to your needs. These are explained below.
Activate PIN validation (mandatory)
| Bamboo & Bitbucket bis Version 2.6.2.0 | Jira & Confluence & Bitbucket ab Version 2.8.2.0 |
|---|---|
 |
|
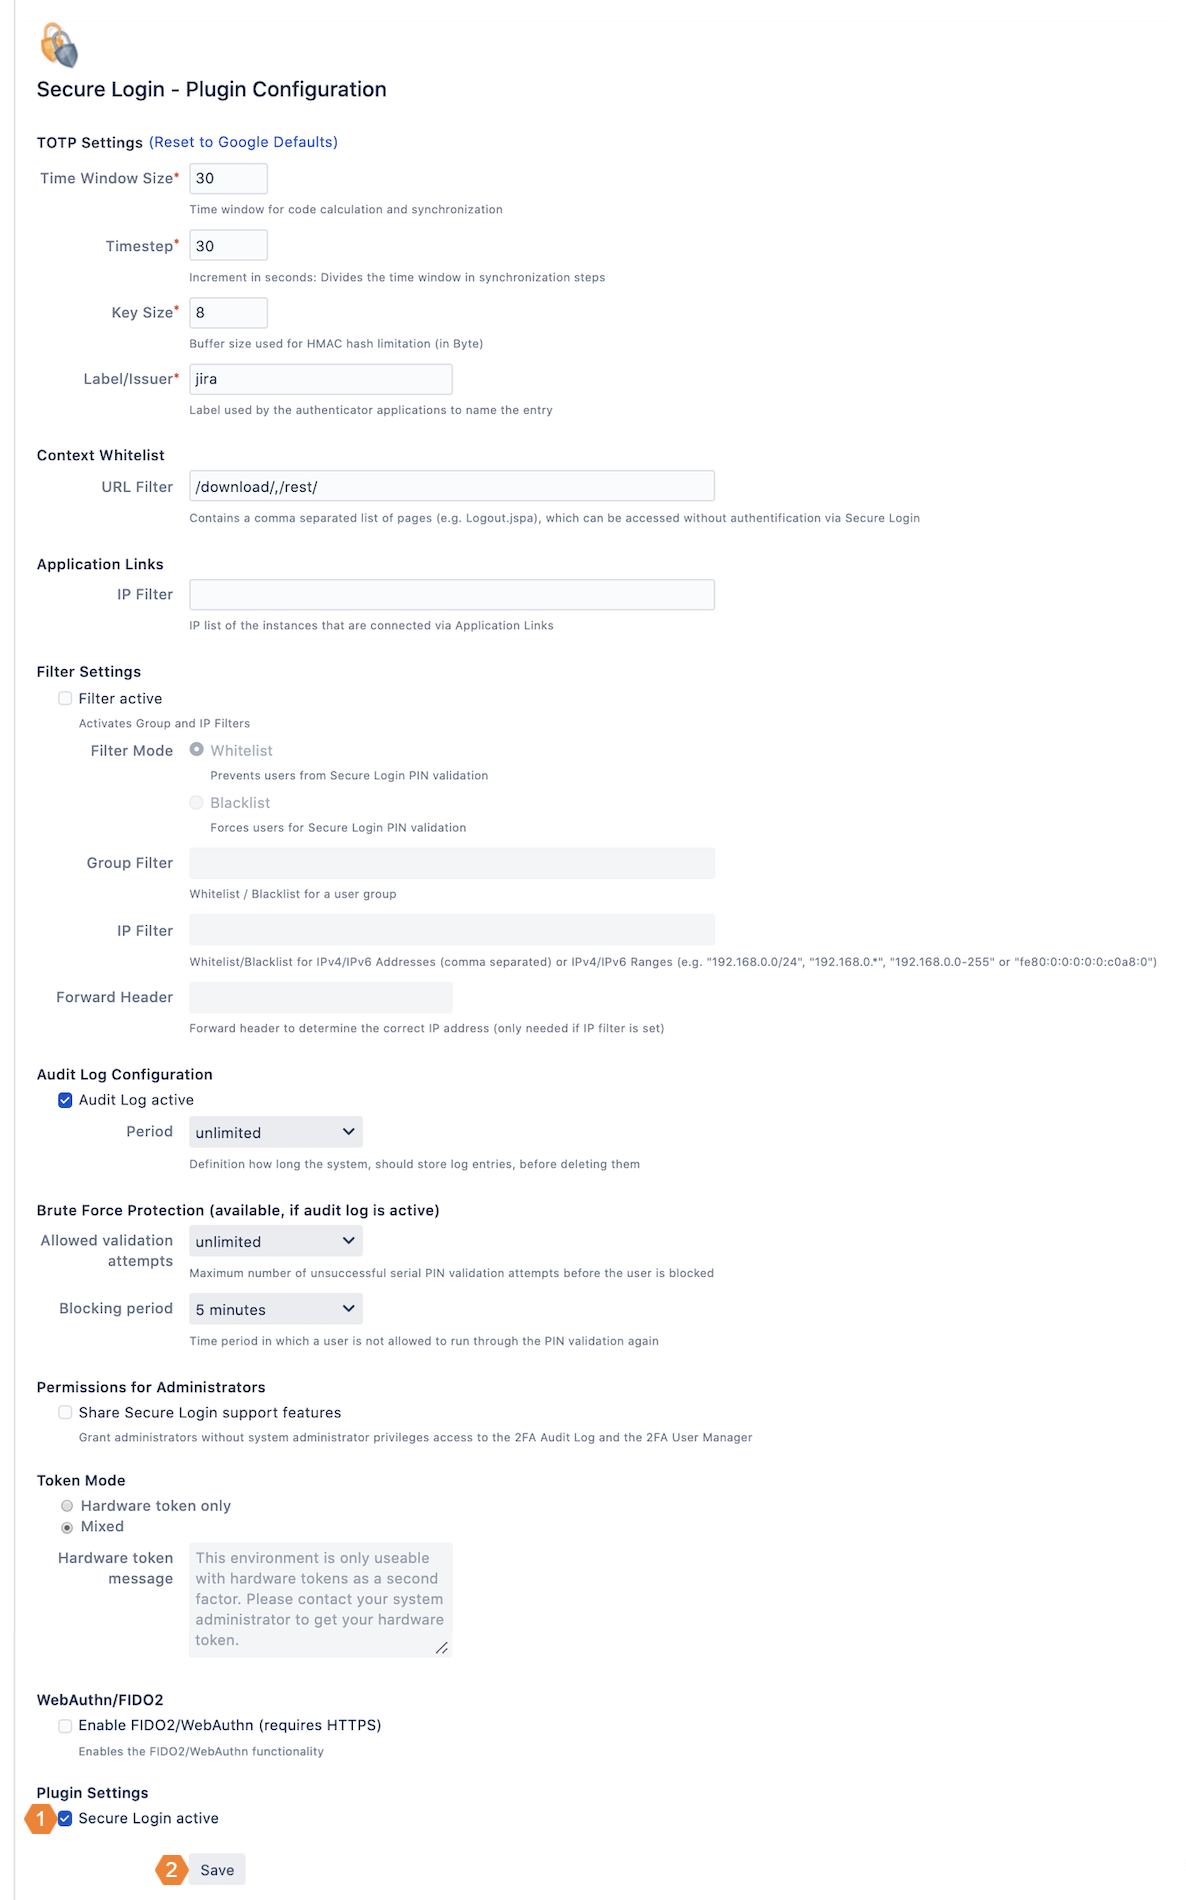
Mark the checkbox Secure Login active at the end of the configuration page.
Click on Save to activate the pin validation of Secure Login.
Secure Login for Bitbucket only secures the web interface of Bitbucket. To protect version management with a second factor, we recommend using SSH keys or similar mechanisms. That ensures that the second factor is compatible with a large number of clients that can be used to access version management.
Additional settings
TOTP Settings
Time Window Size | This parameter for the TOTP protocol defines, how many generated PINs should be valid. The default value is 30, which means, that the last 30 and the next 30 generated PINs, based on the actual timestamp are valid. |
|---|---|
Timestep | Defines the time interval, in which a new PIN is generated. The default value is 30 seconds. |
Keysize | Length of the HMAC hash in bytes for the generated secret key. |
Label/Issuer | Definition of the label, which is displayed by the (mobile) Authenticator as an identifier for the underlying Atlassian application. |
Context Whitelist
URL Filter | Definition of paths to pages that need to be reachable without PIN validation. You can delete specified paths or define additional paths if they follow the format /path/. |
|---|
Application Links
IP Filter | List of IP addresses of other Atlassian instances, which should be allowed to access the current instance via application links. |
|---|
Filter Settings
Filter active | Activation of the filters. If you have defined filters in the following settings, you must explicitly activate them by checking the Filter active checkbox. |
|---|---|
Filter Mode | The decision is whether the filters should be interpreted as whitelist or blacklist.
|
Group Filter | Definition of user groups for which the filters are to apply. You can enter the names of the user groups and separate several groups with commas. |
IP Filter | Definition of IP or IP ranges for which the filters are to apply. You can enter single IPs separated by commas or IP Ranges in the following formats:
|
Forward Header | A custom forward header which can be set to identify the original IP address behind a proxy. If no value is set, the X-FORWARDED-FOR header will be evaluated. |
Audit Log Configuration
| Audit Log active | Activation of Secure Login's own audit log: the audit log stores information about successful or failed onboarding processes and logins if enabled (default = active/enabled). |
|---|---|
| Period | Definition of the maximum storage period for audit log entries. An automatically executed service will delete all audit log entries being written before the configured time period. |
Brute Force Protection (available, if audit log is active)
| Allowed validation attempts | Maximum number of unsuccessful serial PIN validation attempts before the user is blocked for configurable time period. |
|---|---|
| Blocking period | Time period in which a user cannot validate the PIN again. After that the user has an attempt before being locked again for the specified period. |
Permissions for Administrators
| Share Secure Login support features | Enable support functions for administrators. Administrators will be able to view 2FA Audit Log and 2FA User Manager. In addition, they can use the features of the mentioned Secure Login pages: Export the audit log as CSV, revoke users token and register new Secure Login users. |
|---|
Token Mode
| Token mode | Switch between Hardware token only and Mixed mode to prevent or allow onboarding of users at login. Hardware token only mode prevents onboarding by the user and allows onboarding only to system administrators or authorized administrators. Mixed mode allows the use of hardware tokens and software tokens and allows the user to onboard at login. |
|---|---|
| Hardware token message | If you select the Hardware token only mode, you can define the displayed notification for the user at login. The default message is: This environment is only useable with hardware tokens as a second factor. Please contact your system administrator to get your hardware token. |
WebAuthn/FIDO2
| Enable WebAuthn/FIDO2 (requires HTTPS) | Enables WebAuthn/FIDO2 functionality. |
|---|
Audit Log
All relevant actions of Secure Login are logged. This audit log is accessible for administrators only: you can easily find out which user has registered or logged in and when. You can also use various filters to find precisely the entry in the log you are looking for. You can also export the entire log.
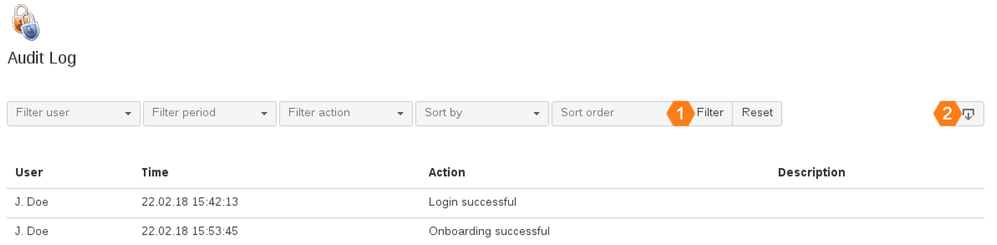
Configure the filter according to your preferences and click Filter to get the result. It is possible to combine different filters. To reset the filter, click Reset.
If you want to export the entire audit log, click  . A CSV file is stored on your computer.
The audit log can be very large. It is strongly recommended to start the CSV export only if it is absolutely necessary and even then not during normal working hours.
Filter configuration
| Filter user | Filters the entries for a certain user. Click on the select box and enter the desired username in the input field. Select the user as soon as he or she has been found in the system. |
|---|---|
| Filter period | Filters the entries for a certain period. You can select a specified period or enter a period yourself. To do this, choose Custom. Two date pickers are displayed in which you can determine when your desired period begins and ends. In the first data picker you specify the start time (the earlier date) and in the second data picker the end time (the later date). If both dates are switched, you will not get a result. |
| Filter actions | Filters certain Secure Login related actions. |
| Sort by | Specifies the column by which the result is to be sorted. If no column is selected, the system sorts by date by default. |
| Sort order | Specifies the sort order according to which you want to sort. If no sort order is selected, the system sorts in descending order by default. |
User Manager and Support of Hardware-Token
The User Manager displays which users are already using Secure Login. Additionally, you can create a Secure Login Profile, if an user should use a hardware token or you can reset a user's tokens, if he or she is no longer able to log in (e.g., the user has changed the authenticator/smartphone without performing a new pairing or has lost it).

Click Revoke Secret Key to reset a user's token. The user will then disappear from the User Manager, if the user has no valid device, too.
 Click Revoke device to reset a user's WebAuthN/FIDO2 device. The user will then disappear from the User Manager, if the user has no secret key, too.
 Click Register user to create a Secure Login Profile for a user. A profile, which is created by an administrator cannot be revoked by the user. If your organization uses hardware tokens instead of smartphones for 2-factor authentication, the user registration allows you to input the predefined secret keys of the hardware tokens or generate secret keys for configurable hardware tokens.
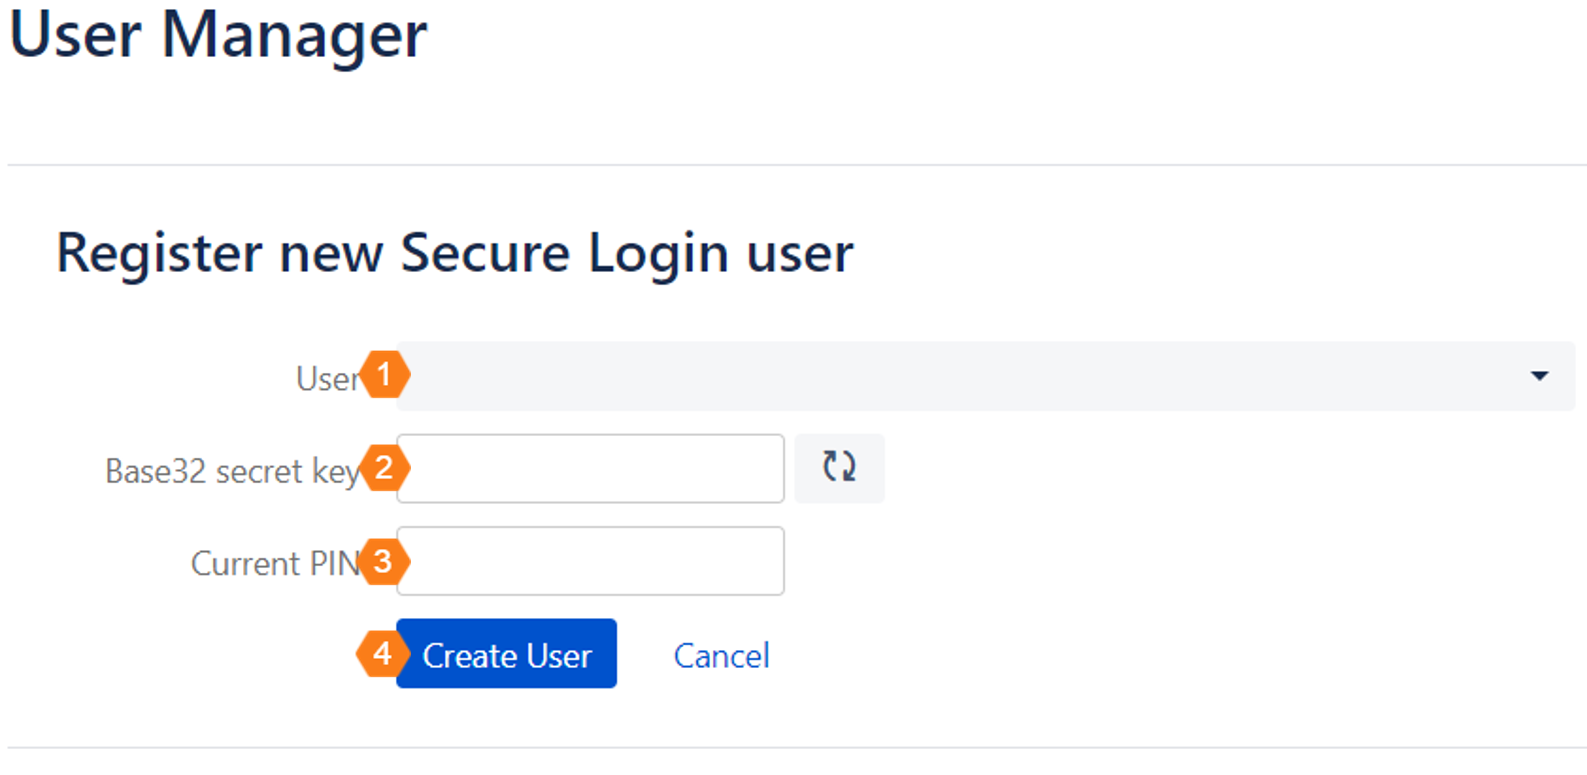
Select the user, who will be the owner of the new Secure Login Profile.
Enter the secret key specified by the hardware token in the Base32 secret key field or generate a secret key by clicking![]() . A new secret key is generated and appears in the Base32 secret key field. You can store this secret key on a configurable hardware token to pair it with Secure Login.
. A new secret key is generated and appears in the Base32 secret key field. You can store this secret key on a configurable hardware token to pair it with Secure Login.
 After pairing the hardware token, it generates pins for 2-factor authentication. Input the current valid pin into the Current PIN field to finish the process.
 Click Create User to save the new Secure Login Profile.
Reset an administrator's account
If you have excluded yourself, for example you have changed the authenticator or smartphone without performing a new pairing, you have two options for re-accessing as admin:
- Team solution: Another administrator has to log in and reset the Secure Login Token for the affected colleague. Then, the pairing can be performed again.
- Technical solution: It is possible to reset a Secure Login token directly by accessing the database. The following instructions explain how to do this, but we do not recommend it.
- Connect to your database using the database management tool of your choice.
- The affected user has only a PIN
Identify the SECURE_LOGIN_USER table in your database. This table is named
AO_xxxxxx_SECURE_LOGIN_USERwhilexxxxxxis a 6 digit hash value. (e.g.AO_1D83D9_SECURE_LOGIN_USER)- Get the account row by looking at the column
USER_IDENTIFIER. This column contains the user keys of the users. To reset the account, delete the corresponding data set from the SECURE_LOGIN_USER table. e.g.:
DELETE FROM AO_1D83D9_SECURE_LOGIN_USER WHERE USER_IDENTIFIER = 'j.doe';
The affected user has a device or a device and PIN
- Identify the SECURE_LOGIN_USER and SECURE_LOGIN_DEVICE table in your database. This table is named
AO_xxxxxx_SECURE_LOGIN_USERandAO_xxxxxx_SECURE_LOGIN_DEVICEwhilexxxxxxis a 6 digit hash value. (e.g.AO_1D83D9_SECURE_LOGIN_USER,)AO_1D83D9_SECURE_LOGIN_DEVICE - Get the account row by looking at the column
USER_IDENTIFIERin both tables. This column contains the user keys of the users. To reset the account, delete the corresponding data set from the SECURE_LOGIN_DEVICE table. e.g.:
DELETE FROM AO_1D83D9_SECURE_LOGIN_DEVICE WHERE USER_IDENTIFIER = 'j.doe';
Also delete the corresponding data set from the SECURE_LOGIN_USER table. e.g.:
DELETE FROM AO_1D83D9_SECURE_LOGIN_USER WHERE USER_IDENTIFIER = 'j.doe';
- Identify the SECURE_LOGIN_USER and SECURE_LOGIN_DEVICE table in your database. This table is named
- The affected user has only a PIN
- If this has been successful, the affected user will be prompted for a new pairing at the next login.
- Connect to your database using the database management tool of your choice.
Data security and privacy
Secure Login stores personal data in the database on various events. The following section explains where and for which purpose this data are stored. It also explains how the data can be irretrievably deleted if necessary.
User configurations
Performing an onboarding process, Secure Login generates a secret key for the user, required to generate the PINs for the two-factor authentication (2FA). This key is stored within the database table AO_xxxxxx_SECURE_LOGIN_USER together with the user identifier, creation time, a server label and a validation flag.
The Secure Login user profile allows users to revoke their secret keys on their own as a self-service mechanism. The necessary procedure is described in the section Revoke Token of the User's Guide. In case of revocation, the corresponding database entry will be completely and irretrievably deleted.
The same applies if a secret key is revoked by an administrator within the Secure Login User Manager. For more information, see User Manager.
If a user with a Secure Login user profile is deleted, the user profile will be automatically purged within eight hours by a scheduled job. The process is logged in the application log.
Audit log
Secure Login creates a log entry within the audit log for every successful or failed onboarding or login attempt. These audit log entries are stored within the database table AO_xxxxxx_AUDIT_LOG_ENTRY. In the plugin configuration, you can define how long the audit log should be stored. All entries that are older than the defined period are automatically purged at regular intervals. The process is logged in the application log. More detailed information can be found in the section Configuration.
Application log
Secure Login records various entries to the application log depending on the configured log level and use case. The following describes in which log level Secure Login writes which user-related data to the application log:
| INFO |
|
|---|---|
| DEBUG |
|
| WARN |
|
Need more help?
If you have any further questions, problems or suggestions for improvement, please feel free to visit our Service Desk or contact us directly. We look forward to helping you.
Write a review for Secure Login
We would also appreciate it if you would write a review for Secure Login in the Atlassian Marketplace. Just select the application for which you have installed Secure Login below. The appropriate review page from Atlassian Marketplace will open. Select Write a review in the top right corner of the content area and enter your review. Thank you very much!
Visit review page of Secure Login for
On this page:
